
Platform Onboarding Guide: Welcome to Our Platform – Your Complete Getting Started Guide for Developers, QA Engineers, and Content Editors
The Platform Onboarding Guide explains how to start using a staging environment designed specifically for safe pre-production validation and collaborative review. This guide teaches developers, QA engineers, and content editors how to create accounts, navigate the dashboard, preview and test content, run theme and template validations, and collaborate on fixes before anything reaches production. Many teams struggle with fragmented preview workflows, risky direct edits to live sites, and unclear role boundaries; this guide presents a clear, repeatable approach that reduces deployment risk and accelerates review cycles. You will learn step-by-step account setup and secure login practices, a visual tour of the dashboard and workspace customization, detailed content preview and theme testing workflows with checklists, the collaboration model for role-based reviews, and where to find troubleshooting and extension points. Throughout, relevant keywords like getting started guide, platform overview, content staging workflow steps, QA testing environment setup, and user roles and permissions management are integrated to make this a practical, searchable reference. The following sections map directly to daily tasks so you can be action-ready: account setup and login; dashboard overview and navigation; content preview and testing; collaboration and feedback; and troubleshooting, advanced features, and integrations.
The importance of pre-production validation in mitigating risks before deployment is a widely recognized principle.
De-Risking Production Through Pre-Production Validation
The net effect of this is that from a manufacturer’s point of view a new process may be significantly de-risked prior to introduction into a production environment. The paper will examine some of the approaches used, with specific reference to some of the specialised testing and processing equipment used to translate research into outputs useful to industry.
From materials characterisation to pre-production validation: from materials characterisation to pre-production validations to providing processing solutions to industry, PL Blackwell, 2015
How do I begin with the platform? Account setup and login
Account setup and login define how you gain secure access and establish the baseline configuration for project work and previews. The platform uses role-based profiles and project selectors so new accounts immediately map to the appropriate staging environments; this arrangement ensures users see only relevant projects and preview data. Proper setup reduces time-to-first-action and limits permission errors that block testing, making early configuration a high-value step for teams preparing content and templates for validation. Below are the key concepts and a compact procedural overview that prepares you to move from onboarding to active previewing and testing.
What steps are involved in creating my account and configuring initial settings?
Begin with a clear account request or self-signup flow so your role and project access are provisioned correctly; this step ensures the platform maps you to the right staging projects and preview assets. Configure profile details such as display name, timezone, and default project so timestamps, content previews, and notifications align with your workflow. Select your role preset (developer, QA engineer, or content editor) during setup to apply sensible default permissions and workspace widgets that expedite common tasks. Common pitfalls include choosing the wrong project during initial selection and skipping timezone or display settings; correcting these early prevents preview mismatches. After you complete profile configuration, the next priority is establishing secure authentication and reviewing your permission set so you can access previews and testing tools safely.
How do I securely log in and manage permissions?
Authentication combines supported login methods and permission management so access is both convenient and secure for internal teams. Use single sign-on where available for centralized identity control and enable two-factor authentication to add an extra layer of protection for all staging accounts. To view or change permissions, open the user or project admin panel to inspect role assignments, and follow your team’s role-change audit process when elevating privileges to avoid accidental publish rights. If you need additional rights, request them through your organization’s internal access flow so approvals are tracked; avoid sharing credentials or bypassing formal role assignment. Proper authentication and permission hygiene ensure that your previewing and testing activities integrate cleanly with the staging workflow that follows.
SearchAtlas QA Staging is designed as an internal Information Hub and supports these account and profile paradigms by mapping roles and projects to isolated preview spaces, which helps teams validate content and templates prior to production release. Use your organization’s internal onboarding channels to request access to the platform and confirm project assignments before starting content syncs.
What does the platform look like? Dashboard overview and navigation
The dashboard provides a single-pane overview that surfaces projects, recent activity, and direct links to preview, theme, and template tools so teams can move quickly from observation to action. A well-organized dashboard reduces context switching by grouping project selectors, recent builds, and quick actions near the top, enabling efficient triage of issues and faster entry into the content preview pane. Dashboard customization further adapts the workspace to role-specific tasks, improving attention to the controls most relevant to development, QA testing, or content editing. The section below breaks down common dashboard panels and offers guidance for tailoring your workspace to be review-ready within minutes.
Which sections populate your dashboard?
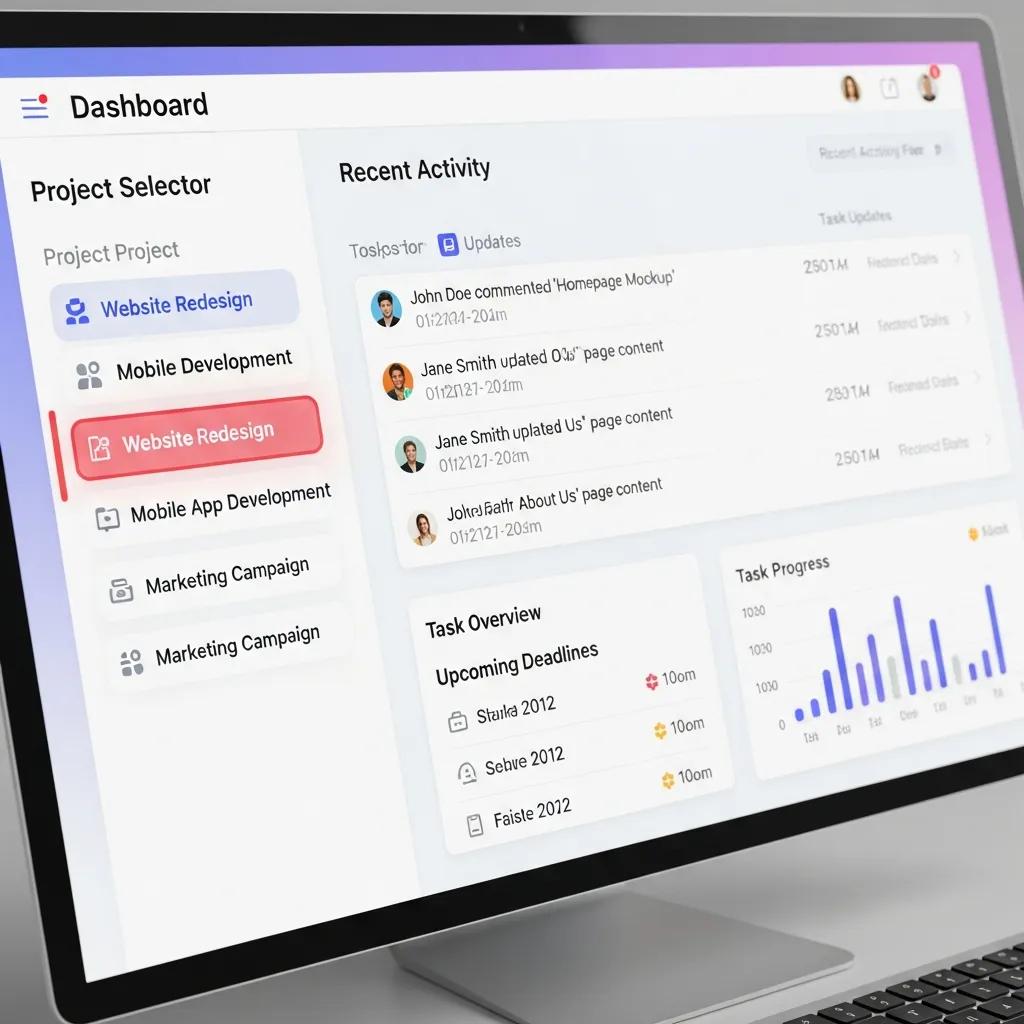
Most dashboards include a project selector, a recent activity feed, a content preview pane, template shortcuts, and a notifications or quick actions area that surfaces builds and approvals. These panels help you jump from an alert to the exact previewed page, open the template library for comparison, or view the latest deployment artifacts related to a ticket. Below is a concise list of the most useful panels and what each enables.
- Project Selector: Switch contexts between staging projects and target sites.
- Recent Activity: See commits, builds, and reviewer comments in chronological order.
- Content Preview Pane: Render pages with current staging data to inspect layout and content.
- Template Library Shortcut: Open templates and theme variants for side-by-side checks.
- Notifications / Quick Actions: Approve builds, re-run previews, or create issues.
Each panel supports common tasks like opening a failing preview or jumping to a template diff, and these panels together create a workflow that flows directly into content preview and testing.
How do you customize your workspace for your role?
Workspace customization lets you save layouts, pin useful widgets, and enable role-specific shortcuts so your most-used tools are always visible. Developers typically pin logs, version controls, and build triggers; QA engineers prioritize preview panes, test case checklists, and issue-creation widgets; content editors focus on template shortcuts, content lists, and inline editing tools. To save a view, arrange the panels, select “save layout,” and name the configuration so teammates can reuse it; to share or reset a layout, use the workspace share or reset controls in the user menu. Recommended default setups reduce onboarding friction for new hires and make role handoffs smoother during review cycles.
How do content preview and testing work? Content preview, themes, templates, and QA workflow

Content preview and testing are the core activities that let teams validate rendering, layout, and functional behavior in an isolated staging context before production deployment. Previews render content using synchronized staging data and selected theme or template variants, allowing side-by-side comparisons and responsive checks that reveal discrepancies early. A disciplined preview and testing workflow includes uploading or syncing content, selecting the correct template and device viewport, running visual and functional tests, and filing reproducible issues for triage. The procedural checklist and table below explain supported preview paths, what to expect during rendering, and common limitations so you can write targeted test cases.
Effective pre-production strategies, especially for multi-platform content, often involve robust user-testing to ensure optimal engagement and functionality.
Multi-Platform Pre-Production & User-Testing Strategies
My ongoing research explores the conceptualisation, development and pre-production strategies in multi-platform storytelling. I ask the key question: How can the writing process adapt and engage with dynamic and diverse models of multi-platform storytelling, allowing effective user engagement with transmedia forms and narrative content, when the emerging technology is evolving, complex and unstable? I document and analyse several development strategies, as well as document creation, storyworld building and script mapping, in the pre-production stages ofThe Dr Egg Adventuresfirst iteration, namely a mobile-platform game and serialised interactive storybookhttp://www.dreggadventures.com/released in June 2018. The Dr Egg Adventures: Incorporating User-Generated Content and User-Testing Strategies in Pre-production Conceptualisation and Development of a Multi …, 2019
What is content preview and how do you upload or sync content?
Content preview renders a representation of a page or component using staging data so reviewers can inspect appearance and behavior without affecting production. Upload or sync methods commonly include manual asset upload, version-control sync, and CI/CD push; choose the method that matches your source workflow to keep staging in sync with current branches. When rendering, expect near-production layout fidelity for templates but know that dynamic integrations or third-party scripts may be sandboxed or mocked in staging, which can affect interactive behavior. For common sync issues, verify your branch selection, confirm asset paths, and re-run the preview build; resolving sync mismatches early reduces false positives in QA.
- Confirm project and branch are correct in the project selector.
- Sync or upload the content and wait for the build to complete.
- Select the intended theme or template variant and device viewport.
- Run visual checks and annotate discrepancies for developers.
After completing these steps you move into theme and template validation, comparing staging renders to expected production behavior.
Different content types require distinct preview approaches and have predictable rendering trade-offs. The table below helps you choose test cases and know what limitations to expect.
| Content Type | Preview Method | Expected Rendering / Limitations |
|---|---|---|
| Static pages | Manual upload or VCS sync | High fidelity for layout; dynamic widgets may be mocked |
| CMS-driven content | CI/CD push or API sync | Templates render authoring fields; live data integrations may be stubbed |
| Media assets | Direct upload or asset pipeline | Visuals render but CDN behaviors are not always replicated |
Use this comparison to plan test cases that exercise both static and dynamic aspects of your pages. Ensuring your preview strategy matches content type leads into a structured theme and template testing phase.
How do you test themes and templates in pre-production?
Template and theme testing validates layout, responsiveness, content placeholders, and versioning so the final production template matches design intent and content rules. Build a test matrix that includes device sizes, content permutations, language variations (if applicable), and accessibility quick checks to catch regressions early. Compare the staging render to an expected production baseline by capturing screenshots, recording DOM differences, and logging responsive breakpoints; include rollback steps and version tags to restore a prior template if regressions appear. Maintain versioned theme artifacts in version control and use labeled builds for clear rollback points.
A compact theme validation checklist:
- Test header, footer, and key components across viewports.
- Validate content placeholders and templating logic with representative content.
- Run accessibility and link checks to catch hidden issues.
Following these validation steps ensures templates behave as intended and reduces surprises during deployment.
How do collaboration and feedback happen? Roles, permissions, and review tools
Collaboration pairs clear role definitions with in-platform review tools so teams can exchange feedback, assign work, and track resolutions without leaving the staging environment. Commenting, inline annotations, and issue creation connect reviewers to developers while role-aware permissions control who can view, edit, or publish. This structure shortens feedback loops by keeping context (previewed URL, template, and build) attached to each comment or issue. The following subsections describe inviting teammates, assigning roles, and the feedback features you will use during reviews.
How to invite teammates and assign roles?
Inviting teammates follows an invite flow that creates accounts or links existing identities to project roles so users gain appropriate access quickly. Common invite options include email-based invites or internal invite links; choose the workflow that matches your organizational policy and ensure role presets are applied to avoid over-permissioning. When assigning roles, use preset profiles (Developer, QA Engineer, Content Editor) for consistency and apply custom permissions only when necessary; maintain an audit log of changes to track who modified access. For bulk onboarding, use role templates to speed provisioning and reduce manual errors.
| Role | Permissions | Can View/Edit/Publish/Comments |
|---|---|---|
| Developer | Code, templates, builds | View/Edit/No publish/Comments |
| QA Engineer | Previews, test cases, issue creation | View/Edit/No publish/Comments |
| Content Editor | Content creation and template fields | View/Edit/No publish/Comments |
This roles table clarifies typical capabilities and supports faster, controlled onboarding across teams. Proper role assignment ensures reviewers have the tools they need while protecting production-facing actions.
What feedback features are available during reviews?
Review tools include inline comments, visual annotations, approval workflows, and integration points to external issue trackers so teams can triage and resolve problems efficiently. Inline comments tie feedback directly to page elements, while visual annotations highlight layout or design issues; approval workflows let stakeholders sign off on a build before release. Use issue linking to pass findings into ticket systems with metadata that includes the preview URL, template name, and build ID so developers can reproduce issues quickly. When choosing between a quick comment and a formal issue, prefer issues for anything that requires tracked remediation and approvals for release candidates.
To encourage consistent reviews, adopt a short set of best practices:
- Use inline comments for specific visual fixes and issues for tracked bugs.
- Add structured reproduction steps and expected behavior to each issue.
- Assign owners and set target remediation windows during triage.
Good review hygiene turns feedback into actionable tickets that flow directly into the staging-to-production pipeline.
How do troubleshooting, extend, and get support? Troubleshooting, advanced features, integrations
Troubleshooting and extension cover common access failures, build errors, and available integration points so teams can resolve problems and expand the platform’s capabilities. A clear troubleshooting checklist and indexed resources reduce time spent investigating basic issues, while knowledge of advanced features like APIs and CI/CD hooks enables deeper automation and integration. Below you will find quick fixes, escalation guidance, and a concise integration reference table for extension planning and known setup notes.
Where to find troubleshooting resources and FAQs?
Start troubleshooting by checking recent activity and build logs to identify failing steps and confirm branch and asset selection; most preview issues are resolved by correcting branch selection or re-running the build. Use the platform’s internal help center and FAQ index for stepwise fixes and known errors; if quick fixes don’t resolve the issue, escalate to platform owners with build IDs, reproduction steps, and logs attached. Common quick-step fixes include clearing build caches, validating asset paths, and confirming permission scopes for the account in question. Following these steps helps you move from diagnosis to resolution with minimal disruption.
If the issue requires escalation, collect the build ID, branch name, affected template, and a short reproduction list before contacting platform owners so they can triage rapidly.
What advanced features and integrations are available?
Advanced features include API access for programmatic preview triggers, CI/CD integration points for automatic staging updates, and connectors to issue trackers for seamless ticket creation from reviews. These integrations let teams automate previews from pull requests, run visual regression tests as part of pipelines, and link review comments to external trackers for end-to-end traceability. Below is a compact integration reference that summarizes common extension points, setup notes, and typical limitations to consider when designing automation.
| Integration | Purpose | Setup Notes / Known Limitations |
|---|---|---|
| Version Control Sync | Auto-sync branches to staging | Ensure branch naming conventions and webhooks are configured; large repos may require selective sync |
| CI/CD Hooks | Trigger preview builds from pipelines | Requires pipeline credentials and artifact paths; build caching may affect repeatability |
| Issue Tracker Connector | Create issues from reviews | Map fields carefully; some metadata may not sync reliably in sandboxed previews |
Using these integrations accelerates staging workflows and ties preview results directly into development and release processes. When implementing integrations, start small with one connector, validate behavior, and expand automation once results are stable.
SearchAtlas QA Staging functions as an internal Information Hub that supports many of these extension scenarios, offering a consolidated environment for previewing content, validating themes, and collaborating on pre-production fixes. For platform-specific API and integration documentation, consult your internal platform owners or the platform’s documentation resources to confirm setup and supported capabilities.